Why Most Businesses Think This Is Harder Than It Is
If you have researched chatbots before and walked away thinking "that is too complex for us right now," you are not alone — and you are not wrong about how it used to work.
Early chatbot implementations required:
- Dedicated developer resources
- Weeks of API integration work
- Complex natural language processing configuration
- Ongoing technical maintenance
That era is over. Modern AI chatbot platforms have removed every technical barrier. Today, adding a chatbot to your website is no more complex than embedding a YouTube video or adding a Google Analytics tag.
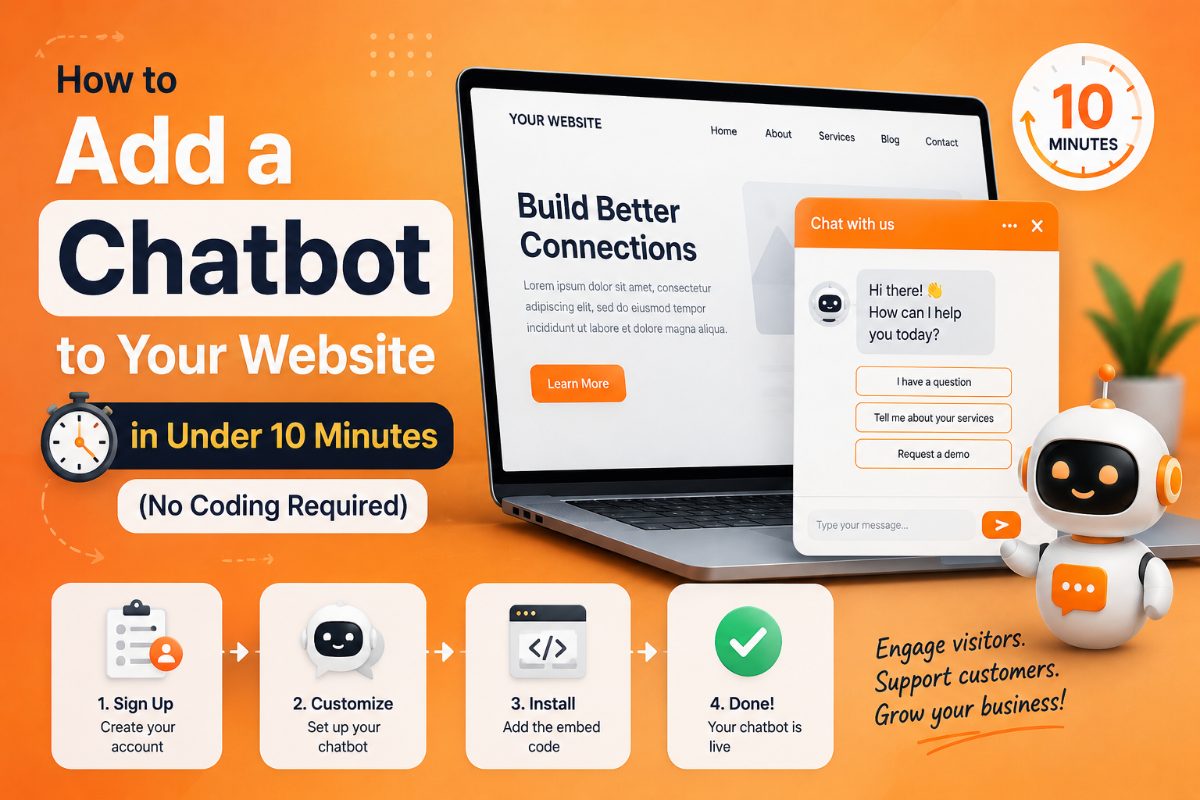
This guide walks through the complete process — from signup to live chatbot — in 10 minutes.
What You Need Before You Start
You do not need coding knowledge. You do not need a developer. You need:
- Access to your website's HTML (or your website builder's embed code section)
- A rough idea of what questions you want the chatbot to answer
- 10 minutes
That is genuinely it.
Step 1: Create Your Account (2 minutes)
Go to pixyai.app and sign up. The free plan lets you create and test your first chatbot before committing to anything.
Once you are logged in, you will land on your dashboard. Click New Chatbot to begin.
Step 2: Name and Configure Your Chatbot (2 minutes)
Give your chatbot a name. This name will appear in the chat widget on your website, so choose something that fits your brand — either your company name ("Acme Support"), a friendly persona name ("Maya from Acme"), or something simple like "Ask us anything."
In the configuration settings, you can set:
- Primary color: Matches your brand palette so the widget feels native to your site
- Initial greeting: The first message visitors see when the widget opens ("Hi! How can I help you today?")
- Bot avatar: An icon or image that represents your chatbot
- System prompt: Optional instructions for how the bot should behave and respond
For your first chatbot, keep it simple. You can refine these settings anytime.
Step 3: Add Your Knowledge (3 minutes)
This is the step that turns a generic AI into your specific business assistant. Your chatbot will only know what you teach it.
Option A — Paste your content directly
In the Knowledge Base section, click "Add FAQ" and write question-and-answer pairs for your most common inquiries. This is the fastest way to get started.
Example:
- Q: What are your pricing plans?
- A: We offer a free plan and a premium plan at $13/month. The premium plan includes unlimited chatbots, advanced analytics, and priority support.
Option B — Upload a document
Upload a PDF, Word document, or text file. Pixy AI reads the content and uses it to answer questions. Ideal for product guides, FAQ documents, or help articles you have already written.
Option C — Add multiple sources
Add as many knowledge entries as you like. The more relevant content you add, the more accurately your chatbot will respond.
Tips for better knowledge content:
- State facts clearly and simply — avoid ambiguous phrasing
- Include your pricing, features, policies, and common "how do I" questions
- Update the knowledge base immediately whenever your products or policies change
Step 4: Test Your Chatbot (2 minutes)
Before going live, use the preview panel to test your chatbot with real questions.
Ask the same questions your customers ask most often. Then ask the tricky edge cases. Look for:
- Incorrect or missing information
- Responses that are too long, too short, or off-tone
- Questions the bot cannot answer (add these to the knowledge base)
A chatbot that handles your top 10 most common questions well is ready to go live. You can always improve it after launch.
Step 5: Copy the Embed Code (30 seconds)
In your chatbot settings, find the Embed section. You will see a short JavaScript snippet — one or two lines of code that look something like this:
`html
`
Copy this code.
Step 6: Add It to Your Website (30 seconds to 1 minute)
Paste the embed code just before the closing

